navbar

Mapped @ Image Mapper

10/2/12

Sophisticated Nurseries: Boy & Girl

I received a special package in the mail a couple weeks ago. No, not a baby. It was Restoration Hardware's new catalogs. Do they send everybody the Baby & Child version or are they just hinting at something? Anyway, I flipped through every last page and couldn't help but create a couple of moodboards inspired by their gorgeous pieces.

I've created an unnecessary debate inside my head. Back and forth. All. The. Time.

Will I end up with...

1. A glamorous, Mariah Carey closet, type nursery
2. A sophisticated, RH inspired space
3. A fun loving, kids color on the walls with crayons, type room.

Only time will tell. But for now, check out some option 2's.


*All items from RH or RH Baby & Child*


Seems like a pretty good option, now! Don't you think?

**Please don't forget to go follow my new blog, Bobi Law Designs, if you are interested in staying updated with my bizarre antics. Soon, all of my content will be published solely on the new site. Thank you!**


9/30/12

Sleek & Simple: Acrylic Furniture (& an Announcement)


I love this trend. Honestly, I can't get enough of it. I don't know that there is a more versatile piece of furniture. You want a glamorous space? Or modern? Traditional or eclectic? Acrylic furniture will work it's magic in any of these spaces. Check them out below.


Pictures via Pinterest
1. 2. 3. 4. 5.

Simple. Sleek. Beautiful.

It's amazing how many acrylic pieces are out there right now. From barstools, to tables, and even accessories. Below are some of my favorite, affordable pieces.


1.2.3.4.5.

As some of you might know, I have been on the hunt for a coffee table and have contemplated using a sleek acrylic piece. While I was searching for pieces to include in this post, I stumbled across what might be my favorite acrylic piece...ever! Unfortunately, it couldn't be included in the affordable finds above. But it is beautiful, nonetheless.


Stunning, right? 

On another note, I will be changing my blog to a new address soon. If you would like to continue to follow me, please head over to Bobi Law Designs and add the site to your reader. I will keep this site up temporarily, but will eventually blog solely from the new site. Thanks:)

9/14/12

I thought SPAM was out : Apology!


Isn't it 2012???

Apparently, I have had meany readers send me emails over the last year. Unfortunately, they went totally unnoticed by me.

I want to apologize to any of you who have been waiting for a response from me.

I will work hard this weekend to respond to every last one:)

Sorry again...from Kodi and Molly, too.


Happy friday:)

9/12/12

Hump Day Randoms


1. Leopard Loafers are my go to flat this fall.


via Aldo 

2. When you go to the grocery store hungry....


You end up with these.

3. Wayne. Newton.


I'll see you this weekend.

4. Can't get enough of Minka's gorgeous locks.


We'll see how close my hairdresser can get next Thursday.

5. How many pumpkin recipes can one girl pin on pinterest?

(picture via sheknows.com)

You betch-ya I am going to try all of them.


9/7/12

DIY Drapes: Tutorial & Reveal


Good morning, friends! 

I've got the day off today. 

My new MayBook has tennis, shopping, and coffee on the agenda.


Hmmm...that bold, yellow, geometric pattern reminds me of something...

My new drapes!


I opted to use Covington's Windsor fabric in Citrus. 

5 1/2 yards at $12.98/yard = $71

$71 + 15% off coupon code + free shipping = $61

Not bad for custom drapes, right?

I do plan on getting a new curtain rod that is wider. I am hoping that will make the window look a little larger.

And now for the short, simple, bad iPhone pictured tutorial.

Step 1:

Iron your fabric. Yes, unfortunately, this step is necessary.

Step 2: 

Cut your fabric into 2 even pieces. My 5 1/2 yards was actually 203 inches long, because fabric.com gives you 37 inches/yard. I just folded in half, ironed to make a crease, and cut.

Step 3:

Prep the side hems.

 I opted to keep the edge piece on my fabric and used it as a guide for my hem.


Just fold over twice, iron, and pin.

Step 4:

Sew the side hems.


Step 5:

Prep the top hem.

I ironed a 1/2 inch fold at the top of my drapes, and folded over another 3 1/2 inches. 


Step 6:

Don't sew yet!

We need to add the tabs first.

I used 4 inch strips of white ribbon for my tabs. 

Pin the ribbon in place (under the top hem).


Sew close the the bottom edge of the hem. See Below.

Step 7:

Fold over the top of the ribbon and pin in place.


I sewed one inch from the top of the hem so that the hem would stick up above the curtain rod a little, when hung.

Step 8:

Hem the bottom.

This will depend on how long you want your drapes. I made a 3 inch bottom hem.

Step 9:

Hang and enjoy:)


Have a great weekend:)


8/26/12

Coffee Table Envy


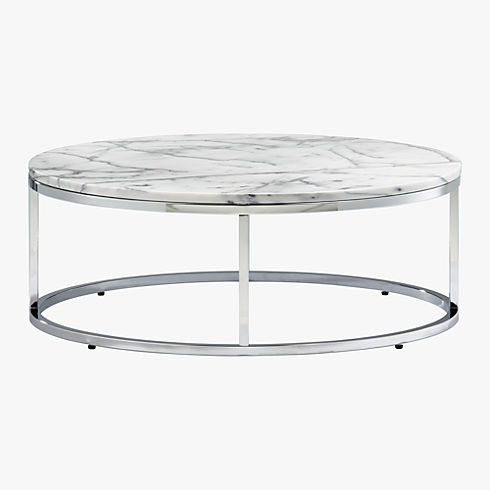
I'm on the hunt. The hunt for a sophisticated coffee table.

I've spotted all different kinds, ranging in price and shape, but they are all glass and oh so pretty.

I would prefer a round coffee table to go "inside" our L shaped sectional, but there are many more options in the square/rectangle realm. 


You might notice the clunky coffee table covering up the cowhide rug. It HAS to go.

Here are some options. Of course, some are attainable, others are inspiration:


3. Foxed Mirror Coffee Table from West Elm $399


3. Euro Style Sandor Coffee Table from Nebraska Furniture Mart $180


My favorite, #3. However, I wish it had a bottom shelf to hold additional items. I'm keeping my fingers crossed that it will go on sale soon! 

Hope you all had a great weekend:)

8/25/12

Product Rave: May Books


I stumbled across a Groupon this past week that I just couldn't pass up. 

$25 for two customized May Books.


The possibilities are endless with these books. Mix and match different backgrounds, labels, fonts, and calendars/notebooks (the insides!).

My original plan was to buy one for my cousin/bff's upcoming birthday, but once I started playing around on the website, I knew I needed one for myself.

Do beware, if you decide to buy one of these puppies, the selection process takes a while when you are indecisive like me. But I promise it is fun!

Here is what my cousin picked out:


And mine:


We both opted to go with the 'Weekly Agenda: Non-dated weeks'.

I will be sure to update you on the product once I receive it.

Enjoy your weekend:) 


8/15/12


You may have already guessed which goes where, but I am here to give you all the details on my recent fabric purchases.


Top left: Master bedroom pillows

Top right: Master bedroom headboard

Bottom left: being returned:( The dots were too small and the color was too minty.

Bottom right: Drapes for the living room.


I am going to be making some colorblock drapery panels for a friend before I get started on these projects, but I will be sure to share the progress as I go along.

Hope you are all having a wonderful week:)

8/6/12

FOR SALE: Chevron Drop Cloth Curtains


I'm ready to part with my Chevron Drop Cloth Curtains. If you are interested in purchasing them please leave a comment or shoot me an email.

They are pretty long (I am guess around 96-100", but I will double check when I get home this evening). They have a rod pocket but could also be hung with clips. The hem could be pulled up to make them shorter if you need them to be.


$30 plus shipping.

Thanks:)

8/2/12

Fabric Order

I finally pulled the trigger on some fabrics I have been stalking for a while now.


In no particular order:

- Drapes for living room
-Headboard for master bedroom
- Pillows for master bedroom
- Pillows for living room

Can you guess which fabric goes with which project???

Stay tuned in the coming weeks for the reveals:)

7/31/12

DIY Monogram Coasters

I'm back to share a quick project I tackled for a friends wedding gift this past week. I followed this tutorial from Wife&Life.  

Supplies needed:

- Ceramic tiles from Home Depot - $0.16/each
- Mod podge
- Scrapbook paper
- Foam brushes
- Clear acrylic sealer
- Felt rounds


Overall, it was an extremely simple project and very affordable. It would make a great housewarming gift for your friends, too!


7/29/12

Kitchen B&A!!!


We finally did it. We dominated our floor tile project in the kitchen/dining room. I don't have a tutorial for how we did it, but I do have plenty of pictures to show the progress throughout the process.

First, I will tell you about the tile we chose. 

This was a long process for me as I didn't want to buy something too modern, for resale purposes, and obviously I was on a budget. Honestly, anything would have been better than the burgundy and gold ceramic tile that we had, right?


Right. So, after about 6 months of tile searching, I decided that the best way to get a more modern look without spending $5/sf was to look for different tile sizes. I REALLY wanted 12 by 24 tiles, like really bad. But, alas, the ones I liked were all out of my price range. I honestly thought about buying large tiles and cutting them in half, but I am glad I didn't go that route after seeing how porcelain tile cuts. 

I decided to go for 18 by 18 porcelain tile. I had been to Home Depot and Lowes probably 50 times looking at their tile options and I would have sworn there was nothing there that would work for me. Everything is so "builder grade", but the prices were right for me. I FINALLY discovered an 18 by 18 option that I liked. I bought a few and brought them home.


$1.87/SF from Home Depot:


It looks a little white/cream in this picture, but it has a beautiful gray veining and hides dirt extremely well (one of my main concerns due to the doggie door that enters onto this floor).

Let's start the process, shall we?

Step 1:

Remove the existing floor tile.

This step proved to be the most difficult task we have ever undertaken as homeowners. And we even finished an unfinished basement! I don't think I have every been so tired or achy from physical labor. Whoever put that hideous tile down wanted to make sure it didn't come up:(


And finally, after about 2 entire days of work, we had a clean surface...


The area in the kitchen had an extra layer of a plywood board that we also removed.

Step 2:

Laying the backer board:


We used a thin layer of...thin set under the board. We did a lot of research on this and found that there were pros and cons to this, but ultimately decided it was best.

Step 3:

Start laying tile!

We had a long drawn out discussion on where we wanted to start the tile and where the pattern should start. Eventually we decided we wanted one tile to be centered at the top of the staircase (not shown, but to the left of the picture). We laid the tile in rows and offset each row to create a standard brick pattern.


Notice our little helpers:)

I really wanted to use the smallest grout spacers possible, like 1/16 inch. However, it is not recommended when using larger tiles like 18 by 18. We ended up using 3/16 inch spacers, the smallest recommended size for our large tiles.


We took a break to go celebrate my niece's 1st Birthday:)

But, it was time to grout when we got home...

We used Polyblend Sanded Grout in Oyster Gray from Home Depot.


The haze took a while to get out. I found that a mixture of water and vinegar worked best. 


We added some thresholds between the wood floors and the tile to create a seamless transition. 


I finally took on the challenge of installing an over the range microwave and I am SO happy that I did. We didn't have an outlet in our cabinet above the vent hood, so I had to install one. We got lucky and our vent hood was on its own circuit so we were able to just move the wires up to the cabinet and install an outlet box. If you are thinking about this, make sure the outlet won't be on the same circuit as your lights, range, refrigerator, or kitchen outlets. I have heard about people having problems with their lights dimming every time they run their microwave:(


We got a new refrigerator as well...and as much as I would have loved stainless steel appliances, we didn't have the budget to replace all of our other appliances. Plus, they are in great condition and in our neighborhood it shouldn't affect resale.


So, let's do a little recap:

Before:


Progress 1:


Progress 2:


Still to do:

* Switch out beige switch plates to white 
* Install new overhead and pendant lighting
* New backsplash?
* New countertops?

You might think I am crazy, or you might agree with me, but I am considering painting the kitchen cabinets again. It all depends on whether or not I feel like taking on some bigger projects like the countertops and/or backsplash. I would love a crisp white kitchen, but my white appliances and white countertops put a wrench in that plan. We'll see:)